
Does your hat need an individualized design that reflects your personal style? Blank leather patches serve as a flexible style tool for personal preferences as well as for event anniversary and brand advertising.
This guide will demonstrate how to properly attach patches step by step. People with experience as well as novices can use this detailed instructional guide to create expert results.
Why Choose Leather Patches?
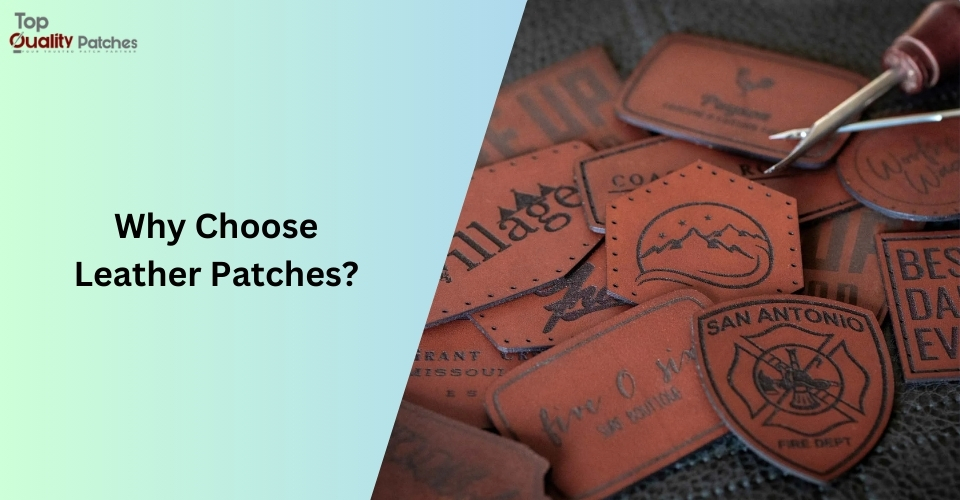
Leather patches feature both durability and a special appearance that enhances the look of your hats. You can trust leather patches to last longer than fabric patches because they handle stresses extremely well.
This makes them suitable for active use during outdoor escapades and general day-to-day hat wearing. Custom hats become statement pieces after you add a leather patch which lets you personalize them according to your preferences.
Tools & Materials You’ll Need
Our strategy requires us to first obtain the required materials for the process.
- Blank leather patches
- Hat or beanie (wool, cotton, or fabric)
- Fabric adhesive (e.g., Aleene’s Leather & Suede Glue)
- Needle and heavy-duty thread (nylon or polyester)
- Sewing pins or clips
- Scissors
- Chalk or fabric marker
- Optional: Sewing machine (for heavy fabrics), leather punch, thimble
Step 1: Prep Your Hat and Patch
Clean the Hat
To start your application process, make sure your hat surface has no dust or lint. Clearing the surface before application will create better adhesive bonding which results in smooth application.
Position the Patch
Use chalk to mark where you want the patch to go. For beanies, center it above the brim; for caps, consider placing it on the side or back panel for a stylish look.
Trim the Patch
You should trim the leather patch according to your requirements. Blank leather patches arrive at most stores with precut dimensions although additional modifications might be required for seamless design implementation.
Step 2: Secure with Adhesive (Temporary Hold)
Apply Adhesive
To start, apply a thin layer of fabric adhesive to the back of the patch. This will provide a temporary hold while you sew it on.
Press and Dry
Press the patch firmly onto the hat for about 10–15 seconds. Allow the adhesive to dry for 1–2 hours, following the product instructions.
Pro Tip:
Use adhesive for lightweight patches or as a temporary hold before sewing. Avoid using glue on delicate fabrics like cashmere.
Step 3: Sew the Patch by Hand
Thread the Needle
Start with two heavy threads then create a knot at the beginning. Additional strength to your stitches comes from using two heavy-duty thread strands knot together at the end.
Start Stitching
The stitching should start from inside the hat to conceal the knot. Sew the edges of the patch by using a whipstitch technique with each stitch spaced ¼ inch from the adjacent one.
Ensure Durability
To achieve maximum durability, you should hit your stitches through the combination of patch fabric and hat material.
Knot Securely
You should finish thread stitching by knotting it inside the hat before cutting away any remaining thread.
Alternative:
When dealing with denim caps or other heavy materials use saddle stitching for a traditional appearance.
Step 4: Machine Sewing (For Heavy-Duty Hats)
If you prefer a machine-sewn finish, follow these steps:
Use a Leather Needle
Leather needles are designed to pierce through leather without breaking, making them ideal for this project.
Set Your Machine
Adjust your sewing machine to a long stitch length (3–4mm) to accommodate the thickness of the leather.
Sew Slowly
Sew slowly around the edges of the patch, guiding the fabric to avoid puckering. This will ensure a clean and professional finish.
Step 5: Finishing Touches
Trim Excess Threads
Use small scissors to trim any excess threads for a clean finish.
Condition the Leather
To prevent cracking and maintain the leather’s appearance, rub a dab of leather conditioner on the patch.
Tips for Success
- Test First: Practice your stitch technique on scrap fabric to build confidence.
- Avoid Puckering: Stretch the hat fabric slightly while sewing to prevent puckering.
- Weatherproof: If your hat will be exposed to the elements, consider using waterproof adhesive for added durability.
Design Ideas for Leather Patches
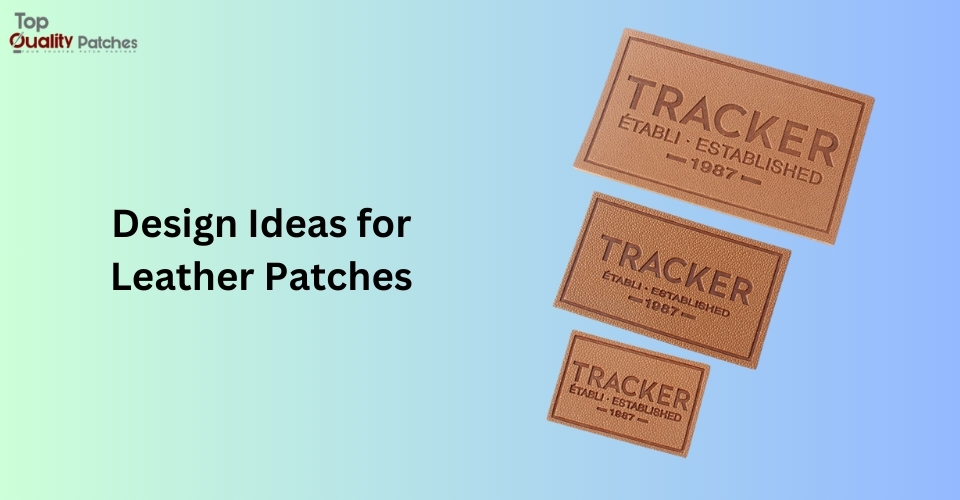
- Monogramming:
Add initials using a leather stamping kit for a personalized touch.
- Painted Patches:
Use acrylic leather paint to create custom designs that reflect your style.
- Vintage Vibes:
Distress the edges of the patch with sandpaper for a worn-in look.
Why Choose Top Quality Patches?
Expert Design and Production
At Top Quality Patches, our talented designers and production experts work hard to turn your custom patch ideas into actual products.
With our extensive experience and advanced technology, we provide high-quality design and production services for all your custom patch needs. Whether you like making your own patch online or working with our team, you can trust that we focus on every detail to ensure perfection.
Competitive Pricing
We understand the importance of budget-friendly options. That’s why we offer affordable prices without sacrificing the quality of our products or services.
If you need custom patches for your business or personal use, we guarantee great value for your money.
Exceptional Customer Service
Serving each customer with exceptional care is our top priority. Our friendly team is always available to answer any questions and provide support during the custom patch process.
Whether you want to design patches yourself or have questions about our services, we are here to help.
High-Quality Custom Patches
Our commitment at Top Quality Patches is to provide superior personalized patches. Whether you’re looking for patches for apparel, your company, or personalized logo patches for t-shirts, we promise to use premium materials and cutting-edge production methods to create patches that are not only strong but also vibrant and long-lasting.
Fast and Reliable Shipping
We know how important it is for you to receive your customized patches promptly.
That’s why we offer reliable and quick shipping options, ensuring your patches arrive on time. We work with reputable shipping partners to provide excellent delivery choices.
Satisfaction Guaranteed
We take pride in the quality of our goods and services at Top Quality Patches. We stand by a satisfaction guarantee for all our personalized patches.
If for any reason you aren’t happy with your order, we will go above and beyond to ensure your satisfaction.
Conclusion:
Attaching blank leather patches for hats is a rewarding project that allows you to express your creativity and style. By following these steps, you can achieve a professional finish that enhances your hat’s appearance. Whether you’re customizing for personal use or branding, leather patches are a durable and stylish choice.
Ready to get started? Visit Top Quality Patches today to explore our wide variety of options and create your custom patches with ease!


