
Creating a custom hat with a leather patch for your kid is a fun and rewarding DIY project. Not only is it a great way to personalize a simple accessory, but it also allows you to add a unique touch that reflects your child’s personality. Whether it’s a special gift for a birthday, a school event, or just a creative activity to enjoy together, a custom hat with a leather patch is both stylish and functional.
In this guide, we’ll walk you through the step-by-step process of making a custom hat with a leather patch for your child, from gathering materials to finishing your design.
1. What You’ll Need
Before you begin, gather all the necessary materials. Most of these items can be found at craft stores or online, and some may already be available at home.
Materials:
- Hat: A plain baseball cap, trucker hat, or beanie in your child’s preferred color.
- Leather Patch: A small piece of genuine or faux leather for the patch.
- Stencil or Design Template: For creating the design on the leather.
- Leather Tools:
- Leather Punch (for decorative holes, if needed).
- Cutting Knife or scissors (for shaping the leather).
- Burnishing Tool (optional, for smoothing edges).
- Paint or Leather Dye: For customizing the patch with colors or patterns.
- Sewing Kit or Fabric Glue: For attaching the leather patch to the hat.
- Thread: Strong thread that matches or contrasts with the patch for stitching.
- Iron (if needed): For heat-sealing certain glues.
- Cutting Mat: To protect your workspace.
2. Step-by-Step Instructions
Step 1: Choose the Hat and Leather

Select a plain hat that fits your child comfortably. Baseball caps and trucker hats are popular choices because they offer a flat, structured surface for the patch.
For the patch, choose a piece of leather that complements the hat’s color. Faux leather is a great alternative if you want an eco-friendly or vegan option.
Step 2: Create Your Design
Decide on a design for the leather patch. This could include:
- Your child’s initials.
- A favorite animal, cartoon character, or symbol.
- A custom logo or pattern.
You can draw the design freehand or use a stencil/template for precision. Keep the design simple and small enough to fit neatly on the hat.
Step 3: Cut and Shape the Leather Patch
Using a sharp cutting knife or scissors, carefully cut the leather into the desired shape. Common patch shapes include:
- Circles.
- Rectangles.
- Ovals.
- Unique shapes like stars or hearts.
After cutting, use a burnishing tool or fine sandpaper to smooth the edges for a polished look.
Step 4: Customize the Leather Patch
Decorate the leather patch to make it unique:
- Use leather paint or dye to add color or details to your design.
- Engrave or emboss patterns onto the leather using a leather punch or stamping tools.
- If using paint, let the patch dry completely before moving to the next step.
Step 5: Attach the Leather Patch
There are two main ways to attach the leather patch to the hat: stitching or gluing.
Option 1: Sewing the Patch
- Use a strong needle and thread to hand-stitch the patch onto the hat. Choose a thread color that matches or contrasts with the leather for a bold look.
- Begin by securing the patch with pins to hold it in place.
- Stitch around the edges of the patch using a running or whip stitch, ensuring it’s firmly attached.
Option 2: Gluing the Patch
- Apply fabric glue or leather adhesive to the back of the patch.
- Press the patch onto the hat in the desired position and hold it firmly for a few minutes.
- Use an iron (if the adhesive instructions allow) to heat-seal the glue for a stronger bond.
Step 6: Final Touches
- Inspect the hat for any loose threads or uneven edges.
- Clean the leather patch with a soft cloth to remove excess glue or debris.
- Let the hat sit for a few hours to ensure the patch is securely attached.
3. Creative Ideas for Kids’ Hats
Here are some fun ideas for designing leather patches that your child will love:
1. Animal Themes
Create patches featuring your child’s favorite animals, like a lion, panda, or dinosaur. Use colorful paints or engrave simple outlines for a playful look.
2. Sports Logos
If your child is a sports enthusiast, design a patch with a soccer ball, basketball, or the logo of their favorite team.
3. Personalized Monograms
Add a classy touch with initials or a full name in a stylish font. This is perfect for school hats or special events.
4. Fun Shapes
Experiment with quirky shapes like stars, hearts, or clouds for a fun and vibrant patch.
5. Nature-Inspired Designs
Incorporate patterns like leaves, trees, or mountains for a more earthy and unique look.
4. Tips for Success
- Test on Scrap Leather: If you’re new to working with leather, practice your design and cutting techniques on a scrap piece before starting on the final patch.
- Use High-Quality Adhesives: Cheap glue can weaken over time. Invest in strong fabric or leather adhesive for durability.
- Keep it Simple: For kids, bold and simple designs are often more appealing and easier to create.
- Involve Your Child: Let your child choose the hat color, design, or even paint the leather patch to make it a collaborative and memorable project.
5. Why Make Custom Hats with Leather Patches?
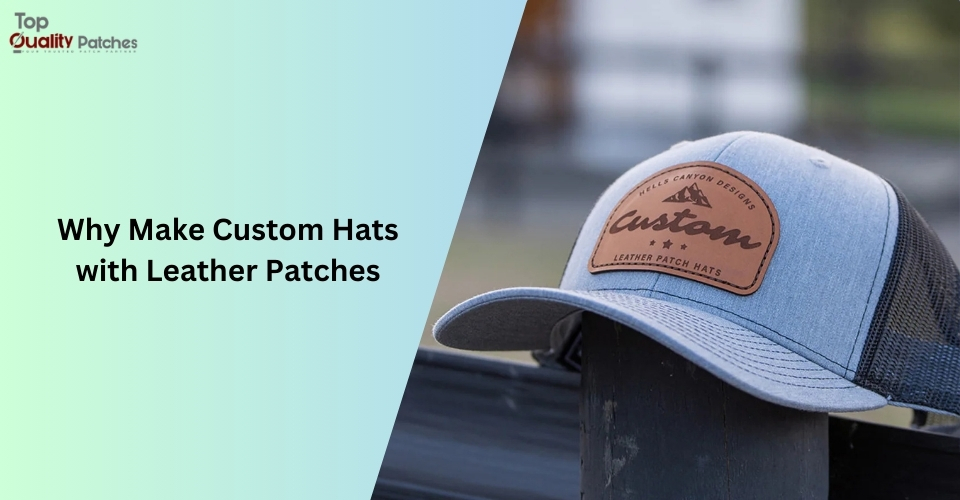
Creating a custom hat with a leather patch for your kid is not only a creative project but also a meaningful way to show them love and attention. The personalized touch makes the hat special, and it can become a cherished accessory for your child.
Benefits:
- Unique Gift: A one-of-a-kind hat makes for an unforgettable present.
- Boosts Creativity: This project allows you to experiment with designs, colors, and materials.
- Functional Accessory: The hat is both stylish and practical for everyday wear.
Custom hats with leather patches are a fantastic way to create a personalized accessory for your child. With just a few materials, some creativity, and a bit of effort, you can craft a unique hat that reflects your child’s personality and style. Whether it’s for a special occasion or a fun DIY project, the result is sure to be both stylish and memorable. Get started today and let your creativity shine!


