
Embroidered applique patches are a versatile and creative way to personalize clothing, accessories, or home decor. Whether you want to showcase your artistic flair, repair damaged fabric, or create a unique gift, making your own applique patches is a fun and rewarding DIY project. With a few materials and some basic sewing or embroidery skills, you can create beautiful custom patches that suit your style.
This guide will walk you through the step-by-step process of making applique patches, from gathering supplies to finishing touches.
1. What Are Embroidered Patches?
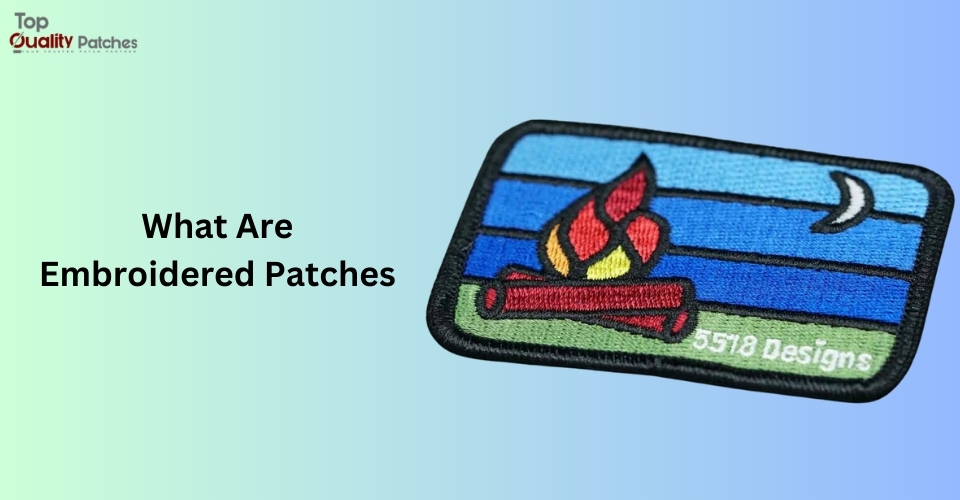
An embroidered applique patch is a decorative piece of fabric that features a design, pattern, or motif created through embroidery. These patches are often sewn or ironed onto garments, bags, or other textiles for decoration or functionality. Applique patches are made by layering one piece of fabric onto another, often with stitched edges or embellishments.
Common Uses:
- Personalizing jackets, backpacks, or jeans.
- Adding flair to plain garments.
- Covering tears or stains in fabric.
- Creating badges or team logos.
- Decorating quilts, pillowcases, or home decor items.
2. Materials You’ll Need
Before you begin, gather the necessary materials. Most of these items are easy to find at craft or fabric stores:
Essential Materials:
- Base Fabric: Choose a sturdy fabric like cotton, felt, or denim for the patch’s backing.
- Applique Fabric: Use fabric that complements your design. Lightweight cotton or specialty fabrics work well.
- Embroidery Thread: Select threads in colors that match or contrast with your design.
- Embroidery Hoop: Keeps your fabric taut while stitching.
- Needles: Use embroidery needles for hand stitching or a sewing machine for machine embroidery.
- Scissors: Small, sharp scissors for precise cutting.
- Stabilizer: Helps keep your fabric in place while embroidering.
- Fabric Glue or Fusible Webbing: Optional for securing layers before stitching.
- Iron: For applying fusible webbing or setting the patch.
- Tracing Paper or Pencil: For transferring your design onto the fabric.
3. Step-by-Step Instructions
Follow these steps to create your own embroidered applique patch:
Step 1: Plan Your Design
Start by deciding what design you want on your patch. You can sketch your design freehand or use stencils, templates, or printed images. Keep in mind that simple shapes and bold lines are easier to work with, especially if you’re a beginner.
Step 2: Prepare the Base Fabric
Cut the base fabric into the desired shape of your patch (e.g., circle, square, or custom shape). Leave a small margin around the edges for stitching. If you’re using a delicate fabric, attach a stabilizer to the back to make it easier to work with.
Step 3: Cut the Applique Fabric
Trace your design onto the applique fabric using tracing paper or a fabric pencil. Cut the applique fabric slightly larger than the design to allow for adjustments. If you’re layering multiple fabrics, cut each piece separately.
Step 4: Assemble the Applique
Place the applique fabric on top of the base fabric in your desired position. Use fabric glue or fusible webbing to temporarily secure the pieces together. This will prevent shifting while you sew or embroider.
Step 5: Stitch the Applique
You can stitch the applique by hand or use a sewing machine. Here are two common methods:
Hand Stitching:
- Use a simple running stitch or blanket stitch around the edges of the applique fabric.
- For decorative designs, use embroidery stitches like satin stitch, chain stitch, or French knots.
Machine Stitching:
- Set your sewing machine to a zigzag or satin stitch.
- Carefully sew around the edges of the applique, ensuring that the stitches securely hold the layers together.
Step 6: Add Embroidered Details
If desired, embellish your applique patch with embroidery. Use embroidery thread to add patterns, textures, or outlines to your design. This step adds dimension and uniqueness to your patch.
Step 7: Trim and Finish
Once your design is complete, carefully trim any excess fabric or loose threads from the edges. If you want a clean, polished look, you can seal the edges with fabric glue or apply a layer of fusible webbing to the back of the patch.
Step 8: Apply the Patch
Your embroidered applique patch is now ready to use! Attach it to clothing, bags, or other items by sewing it on or using an iron to apply fusible webbing. For a removable option, you can add a hook-and-loop backing.
4. Tips for Success
- Practice First: If you’re new to embroidery or applique, practice on scrap fabric before starting your main project.
- Use Stabilizer: A stabilizer prevents fabric puckering and helps maintain the shape of your patch.
- Experiment with Stitches: Combine different embroidery stitches for unique textures and effects.
- Choose Quality Materials: Durable fabrics and threads ensure your patch lasts longer and withstands washing.
- Work with an Embroidery Hoop: This keeps the fabric taut and makes stitching easier and more precise.
5. Creative Ideas for Patches

- Nature Themes: Flowers, leaves, or animals.
- Geometric Designs: Abstract shapes or patterns.
- Personalized Touches: Monograms, initials, or custom messages.
- Pop Culture References: Favorite characters, logos, or icons.
- Seasonal Designs: Holiday-themed patches for gifts or decorations.
Why Us?
At Top Quality Patches, we specialize in delivering premium, custom-designed patches that combine durability, precision, and style. Whether you’re looking for embroidered, woven, or PVC patches, our attention to detail ensures each piece meets the highest standards. We pride ourselves on using the finest materials and advanced techniques to create patches that are vibrant, long-lasting, and tailored to your exact specifications.
With fast turnaround times, competitive pricing, and exceptional customer service, Top Quality Patches is your trusted partner for creating standout designs that make a lasting impression. Choose us to bring your vision to life with unmatched quality and craftsmanship.
Making embroidered applique patches is a fantastic way to express your creativity and add a personal touch to your belongings. With a bit of patience and practice, you can create stunning patches that reflect your unique style. From simple shapes to intricate designs, the possibilities are endless. Gather your materials, start stitching, and let your imagination take the lead!


